My dad went to culinary arts school. So growing up I had a chance to taste all sorts of creations!
When I got married and started cooking for my husband (at the time I could NOT cook) and we had some adventures. I tried simple recipes. After awhile I started making and mixing my own stuff. This has been a slow process simply because I am a busy woman! I have things to do besides slave over a complicated recipe… oh did I mention I am not that patient? ![]()
So a couple weeks ago I made a dish.. from scratch! It was SO easy! I had to share with all you other busy women out there! (Also this was my VERY FIRST time cooking with ginger! I loved it)
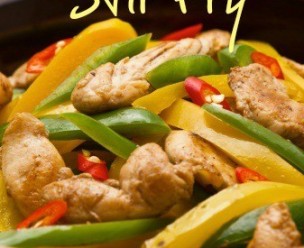
Easy Chicken Stir Fry
Ingredients:
- 2 boneless chicken breast
- 1 bag of minute rice / instant / boil in a bag
- 2 green peppers or red peppers
- 1 large onion, diced
- Vegetable or Olive oil
- Salt
- ginger powder
- garlic powder
- soy sauce
Chicken
Preheat oven to 425. Cut chicken breast into strips. Season chicken with salt, ginger powder, and garlic powder. Sprinkle evenly across the chicken. I did not measure this. Just eyeballed it ![]() Cook the chicken until done. Then cut into bite sized chunks.
Cook the chicken until done. Then cut into bite sized chunks.
Vegetables
Cut the peppers and onion into strips. Then heat up a skillet or frying pan to medium heat with a little oil. I didn’t measure the oil, but my guess is that it was about 3-4 tablespoons. Add 1-2 tablespoons of ginger and 1 tablespoon garlic powder. Saute with the onions and peppers (when the onions are clear they are done).
OK, now I had some instant rice because that is the extent of my talent with rice ![]() I followed directions on box.
I followed directions on box.
Add the chicken to the veggie pan. Add 2 tablespoons of soy sauce. Thoroughly mix into the rice.
Viola! You have a healthy, yummy dinner!!
Disclaimer: I made this portion for just the two of us, so you may want to add more if your cook for a larger family. Also add or take away spices for your families taste buds. Feel free to add more veggies if you want (carrots, snow peas, red onions, water chestnuts, or broccoli). I used what I had on hand. If you have fresh garlic and ginger, use it. It will make it even better!!!
Love,
Aunt LaLa