Thanksgiving dinner wouldn’t be complete without a side of deliciously prepared fresh green beans!
Although green bean casserole is a classic favorite, for those with certain food allergies (or those counting calories), it’s not the best option to put on the table.
That’s why we love this simple, yet delectable dish that truly showcases the flavor of fresh green beans. In fact, this easy-to-make recipe is one we enjoy over and over throughout the year!
It’s just one of the many healthy, whole food Thanksgiving recipes I’m sharing over at The Nourishing Home this month. We hope you and your family enjoy it too!
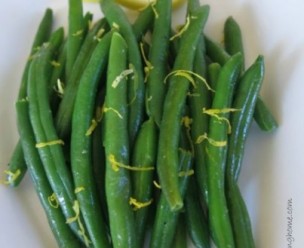
Lemony Garlic Green Beans
2 pounds fresh green beans
2 tbsp butter, plus 1 tbsp olive oil (if DF, use 3 tbsp olive oil)
1-2 cloves garlic minced
2 tsp lemon zest
sea salt and pepper to taste
Snap off ends of green beans and rinse well; set aside. Prepare an ice-water bath in a large bowl. Bring a stockpot of salted water to a boil.
Add green beans to boiling water and cook until color is set and green beans are tender, about two minutes. Drain and transfer beans to ice-water bath to stop cooking. Drain again; set blanched green beans aside.
Melt butter in a large skillet over medium heat. Add the minced garlic and sauté until just fragrant, about one minute. Then, add the blanched green beans and lemon zest. Toss to well coat and rewarm the beans. Season to taste with sea salt and pepper. Transfer to a serving platter and enjoy! Serves 5-6.
Happy Thanksgiving blessings to you and yours,
Kelly at The Nourishing Home